Patch Management for Windows
Panch management is currently available for computers running Windows using wingget and for computers running macOS using Homebrew package manager.
To manage patches, proceed as follows:
- Open the Management Console.
- Open RMM > Computers in the main menu.
- In the computer list, find the target computer, then in the RMM column click the diagram icon.

- As the computer info is loaded, switch to the Patch management tab. By default, you can see available Windows Updates. You can select necessary update and install it by Install Selected button.
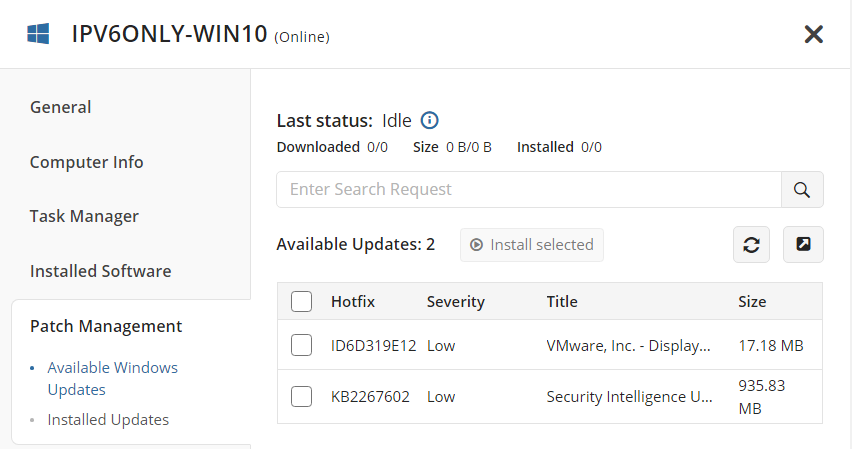
- To check what updates are already installed on the computer, select Installed Updates.
Windows Update Policy
With RMM you can configure flexible Windows Update policy for computers in your environment.
The key features of the RMM Windows Update policy are:
- Windows Update policy is configured in Management Console
- Step-by-step configuration of parameters using the New Group Action task wizard.
- Viewing policies in Management Console
How It Works
RMM Agent (must be updated to version 1.5 or later) periodically requests for new policies from Management Console, then initiates downloading of OS updates of the specified categories. Request frequency is 1 hour and is constant. Each update for specific computer is downloaded and installed separately.
If a local operating system update service is enabled on the computer, it functions independently. This means that Windows Update policy brought by RMM Agent does not cancel it.
Searching and Installing Updates
The search and installation of Windows Updates are combined into one cycle and are executed at the scheduled time. If multiple updates are found and installed, these processes do not interfere each other. RMM Agent downloads and installs only those updates that match the configured policy. Updates with a pending installation timeout are not downloaded.
If there are no policies, the Update Searcher service is not disabled and is used by RMM Agent to search for available updates.
Use Group Action Tasks
To create and configure a Windows Update Policy, proceed as follows:
- Open the Management Console.
- With the new main menu click RMM > New Group Action Task

- Select the operating system of the computers (it is recommended to create a separate Group Action Task for different operating systems). Select whether you can configure Windows update policy, ot install a specific updates.
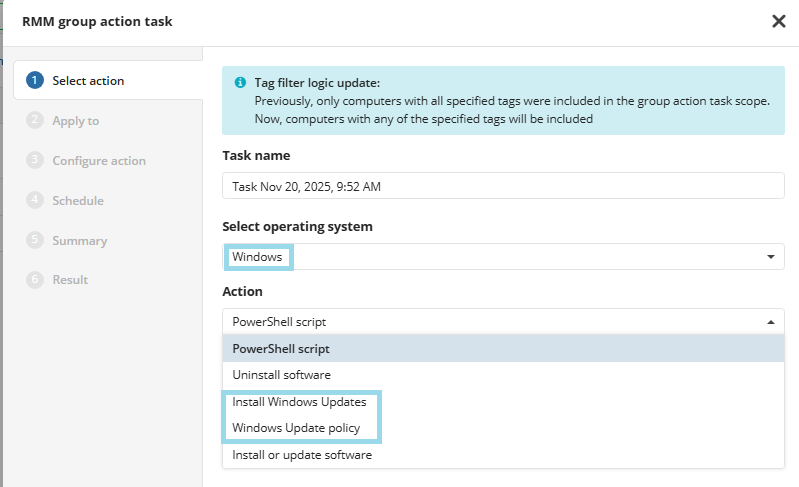
- Proceed with the wizard.
Refer to the following article for details.