RMM Group Action Tasks
RMM offers a set of group actions that can be applied to your users' computers with flexible configuration and settings. Group Actions require Two-Factor Authentication (2FA) enabled.
Note that group actions (except for the legacy) require the RMM Agent version 1.4 or later installed on target computers
Create New Group Action Task
To create and configure a new group action, proceed as follows:
- Open the Management Console.
- Navigate to RMM > New Group Action Task
- Proceed with the wizard steps:
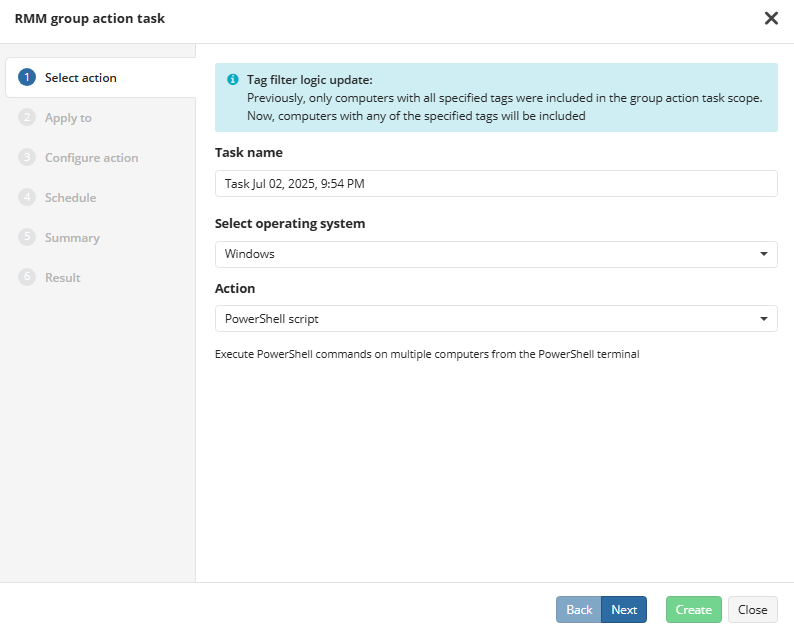
Select Action
If needed, change the Task name. By default, it is generated automatically.
Select Operating system of the target endpoints. It is recommended to create separate tasks for each operating system.
Select the group action to apply to multiple computers. Available group actions:
- PowerShell script: Executes PowerShell script from file or from script library
- Uninstall software
- Install Windows updates
- Windows Update policy
- Install or update software (New)
Click Next.
Select Computers or Companies to Apply Group Action
Select a scope to apply the group action. You can apply group action to all your companies, to specific companies, or to specific computers. You can set specific computers to apply group action by tags, assigned to these computers (This feature requires RMM Agent 2.0 or later). You can exclude specified computers from the group action scope.
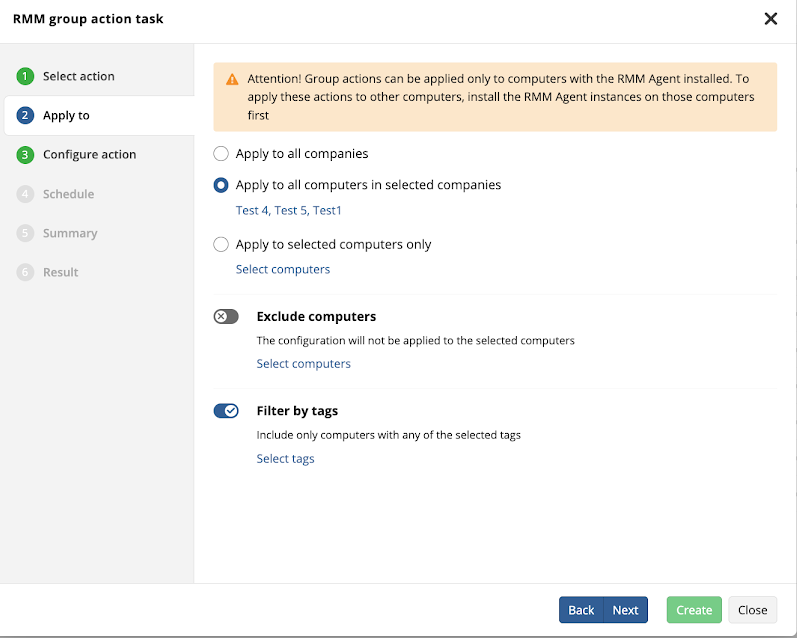
Consider, group actions apply only to computers with the RMM Agent installed and Monitoring enabled. To apply these actions to other computers, install RMM Agent instances onto these computers first. You can select computers that are offline at the moment of selection. The action, in this case, will be applied as these computers come online. Click Apply to save your selection.
To set specific computers to apply group action by tags perform the following:
- Select Apply to computers with the following tags option on the Apply to step of the RMM Group Action Task wizard.
- Click Select tags. Tag-based filtering help you to limit the scope of the task. Task only will be applied to the computer with any of selected tags.
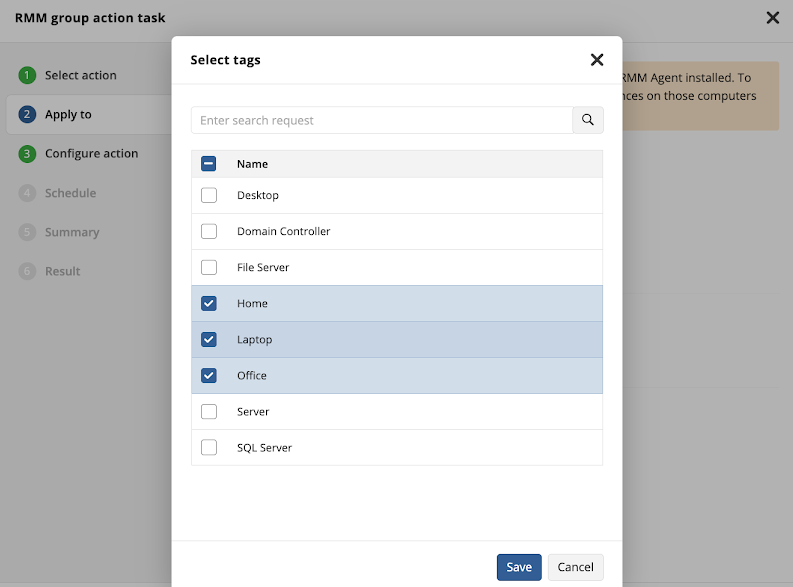
- Once the group action task scope is set, click Next.
Configure Group Action
Configure the action. An example below shows the group installation execution, so the layout of this step is different depending on the action selected on the first step of this wizard.
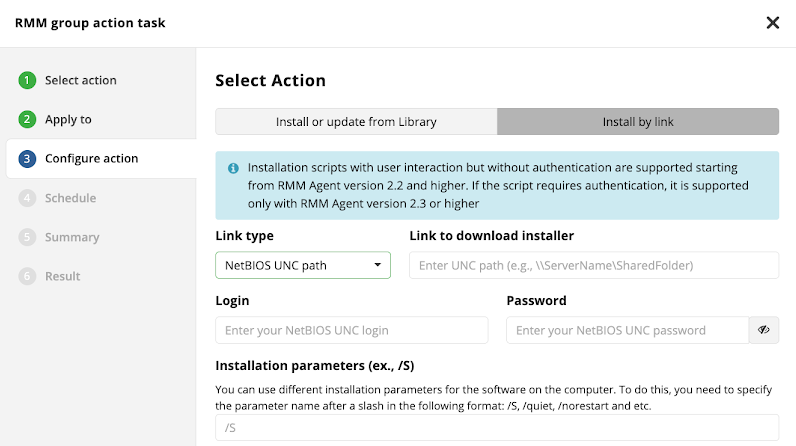
Click Next.
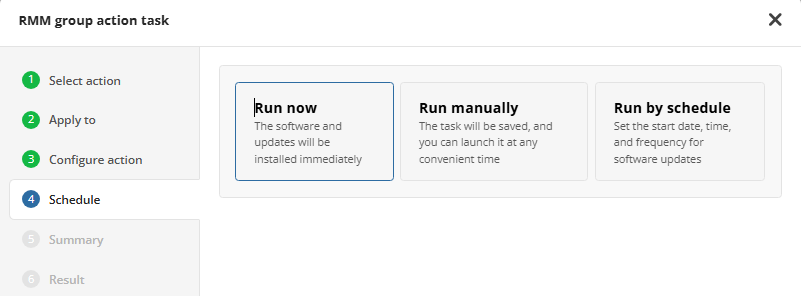
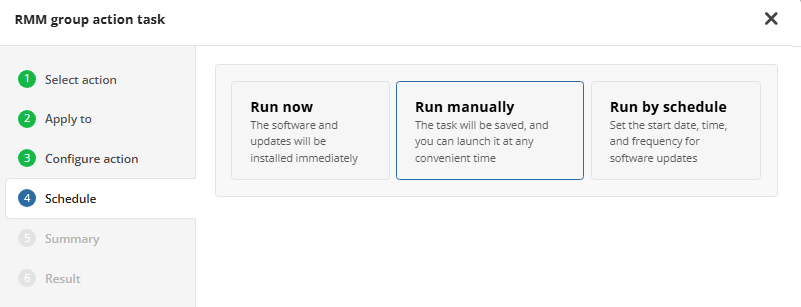
Schedule Group Action
The following options are available to select when created tasks will be executed:
- Run now. Select this option to run the action immediately. If you select this option, the task will only be executed on the computers that are currently online. You will be informed about which computers successfully complete this task and which ones are skipped.
- Run manually. Select this option to run the action manually at any time.
- Run by schedule. Select this option to schedule the task execution.
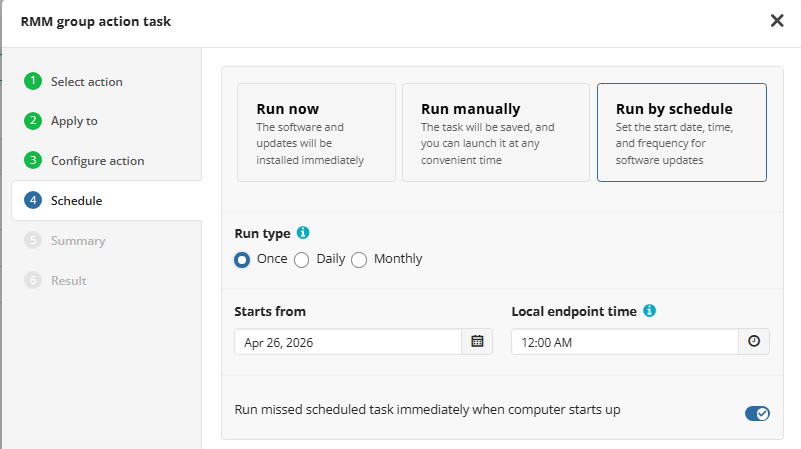
You also can create the schedule for the daily or monthly requrring group action execution.
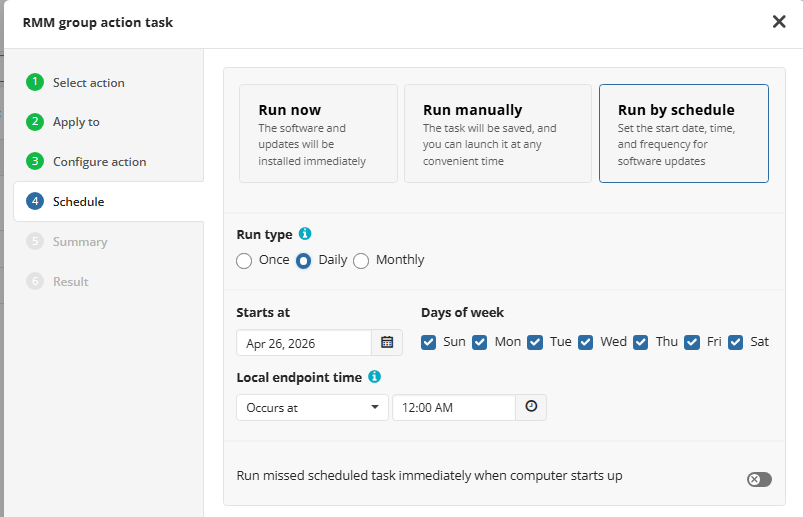
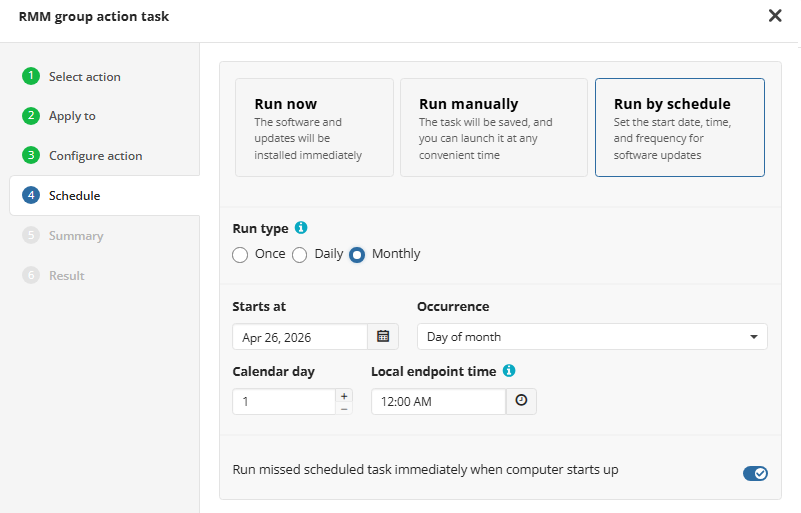
The task can only be executed on the computers that are online. To execute the task on offline computers once these computers come online, the Run missed scheduled task immediately when computer starts up option should be enabled
If required, set the schedule type for the group action execution. You can set the following schedule options:
- Once
- Recurring schedule (daily or monthly). You can create a recurring schedule. The recurring schedule can be used for a task that takes place on a regular basis (e.g., every Monday and Wednesday from October through December on specific weekdays and time).
When you specify the time for the group action execution, remember that the system time of the instance the RMM Agent is installed will be used (local endpoint time)
Once you configure the schedule, click Next.
Complete Group Action Creation
Check the task on the Summary step. Once you complete the new group action task configuring, check the task settings on the Summary step. Click Create. You will be prompted to confirm the task execution.
Confirm the group action according to the selected 2FA verification method.
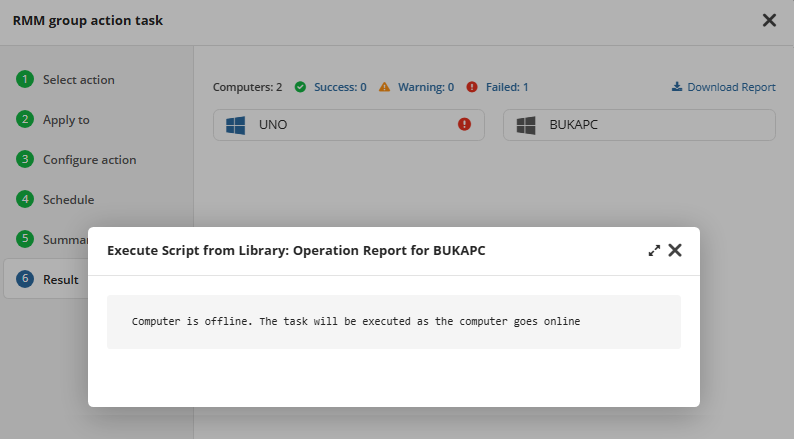
View Result
The result of Group Action task execution can be viewed on the last step of the wizard.
Also group action tasks can be managed and monitored on RMM > Group Action Tasks.

Click on the specific computer to view the detailed information on the group task execution.
- Online computer:

- Offline computer if the Run missed scheduled task immediately when computer starts up option enabled:
View and Manage Existing Group Action Tasks
To view and delete the existing group tasks, proceed as follows:
- Open the Management Console.
- With new main menu click RMM > Group Action Tasks
- To view the group task details, click the task name in the Task column. You can see task details on General tab.
- To view the result of the task, click Last result tab.
- To disable the task, turn off the Task is enabled switch on the General tab. Disabled task can be enabled again, if needed.
To delete the task, expand the actions to the right of the task to delete, select Delete, then confirm the deletion.
